It is with great regret that Happy Daze is closing down. My health has been poor for some time now and continues to deteriorate and I am no longer able to keep operating successfully.
I have slashed 40% off all stock.
I would like to take this opportunity to thank all my lovely customers and the fabulously creative people who have contributed to the design team over the past few years.
I wish everyone luck, happiness and good crafting.
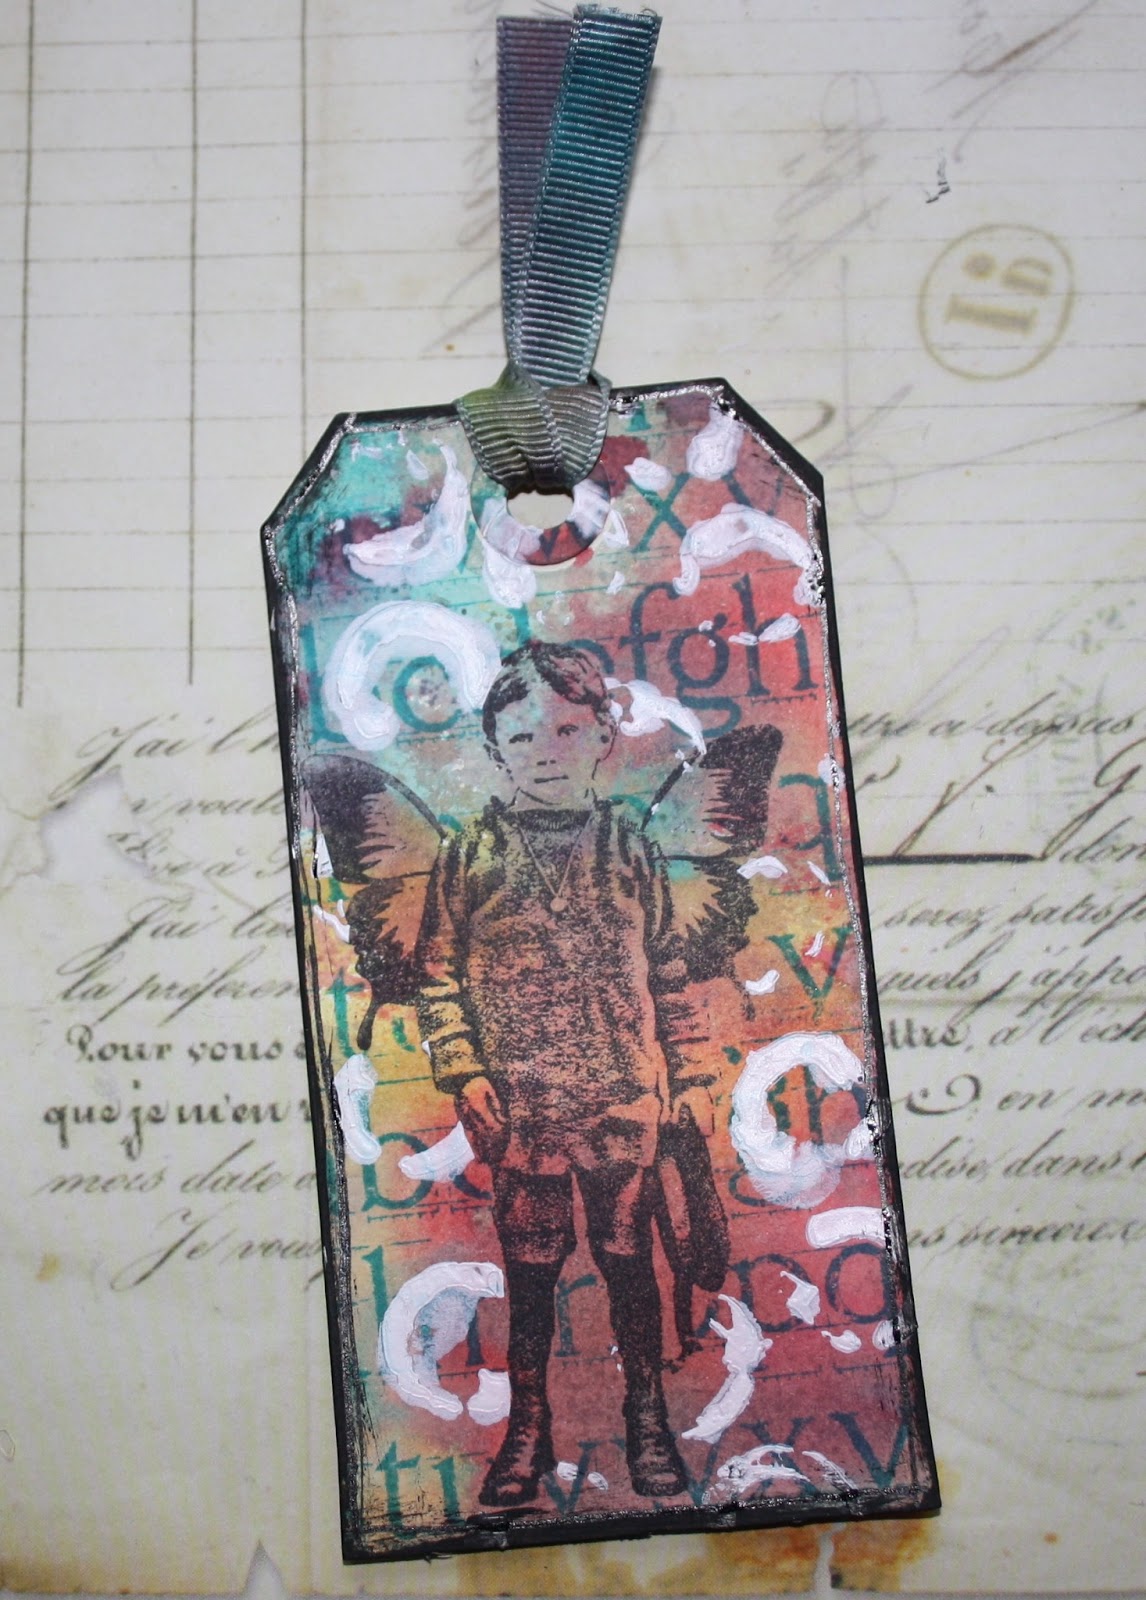
Lots of Single cling left in the Paperbag Stamp section. Some of the most popular images from the sheets available as a single image. Including Addison used on this tag.
I was so sorry to hear the sad news that Moira is closing the Happy Daze shop. I am sending positive vibes to you Moira and hope you feel better soon x
For this card I used an Artistic Outpost stamp set called Lovely Day which is still available on the 40% off closing down sale! Well worth a gander. ALL items in the shop are 40% off. head over there now for some true bargains!
A reshare of a lovely item by Mandy, showing the Vintage Hallowe'en plate that is still available in the sale. There is also a lovely halloween Quote and a few other goodies with this theme left in the Stampotique sections (Jo Capper-Sandon especially has a few lovely ones for this theme).
This week, I decided to have a play with my new stamps.... this wonderful Hallowe'en plate from Artistic Outpost. It's so delightful. I love Hallowe'en, and I envision lots of Hallowe'en inky goodness to come.
I have several house shape templates for ATC size houses, I chose this one to use for this hanging piece and enlarged the template to around a postcard size. I wanted the Hallowe'en girl to fit on nicely. Once I decided on the size, I then cut a house out of this background I made a while ago... it's made by tearing pieces of masking tape and sticking them randomly over the card, then swiping with distress inks.
I stamp all my images in Black Archival as I really love the blackness of it. It's a good idea to set the archival with a blast from the heat tool. I usually colour my images with watercolour pencils using a water brush
The background was made using a selection of the cosmic shimmer vintage colour misters. I love this palette of colours ~ very muted but lush.
The background script stamp is one from viva decor and is stamped in Midnight Blue stazon
All the images are stamped using Versafine and coloured with watercolour pencils.
Have a wonderful week!
Mandy x
mandysmagicalworldofart.blogspot.com
This week I have used a couple of stamps from the Paperbag set of stams Addison.
I coloured my background using the wrinkle free distress technique, this was done directly onto my tag. I then stamped my image in black archival ink and masked it off.
The alphabet from the sheet was stamped with one of the distress inks used for the background. Then using an old strore card I applied gesso thinly through a stencil. Finishing it off with a black dabber and some lines drawn with a pen. I used Paperbag Studio Rubber stamps Tag Distress inks Black dabber white gesso stencil