Wednesday 28 November 2012

November's Guest Designer - Lottie

Lottie has been the guest designer on the blog for this month. and incase you missed any of the lovely things she has shared on here this month here is a round up of her makes.

Her Altered Paint Brush Bucket


Frame using Verday paints


Lovely Apron ( I am so going to do one of these)


Thank you Lottie for your hard work this month and it has been a treat to see what you have made. If you do not follow her Blog it's well worth a visit.

Carol x


Tuesday 27 November 2012

Altering a Tin with Verday Paints...By Carol Fox


This was in it's previous life a M & S mint tin. I Painted it with the Verday Copper Patina paints and solution to give it the lovely patina finish.
I then gave it a coat of Multi medium to seal it before stamping onto it.
I used the Artistic Outpost stamps Paris Exposition and  French Flight, stamping the images directly onto the lid of the tin using Black Stazon ink and masking as necessary.

The current challenge is open until the end  of the month, for the full details and how to upload your link see the post HERE.

Monday 26 November 2012

Fairy of Peace Card

Hi all

For this card I've used the lost coast 'winged girl'  I've made two versions of the card ~ one with the word Peace on... but I'm not sure if I like it better without the word... what do you think?

 I stamped the girl image with Black Archival ink, the edges are wiped round with some chalk inks. 

Must say I'm pleased with the overall card.

Mandy x

Sunday 25 November 2012

Happy and Bright

Hi you still have time to join in with the November Challenge 'Brighten up the Month'.  For my last DT offering this month have chosen to go really wild with the Brights............lol


Used the Girl with the Birdcage by Scrolls Work.  The background was achieved by Paint Squishings and the inner layer is Distress Ink Smearing.  Loving both these techniques.

This birthday card has already been sent to a dear blogging friend and she loved it......phew, thank goodness.

Wishing you a great week ahead, hugs Annette x

Saturday 24 November 2012

If the crown fits.....

put it on me!
I have given in to my obsession and got the Artistic Outpost set of Alice images.... I just LOVE Alice... I keep buying  Alice books to tear up and use but I can't bring myself to do it.

I've made a little card using the White Queen and Alice here ....
I made the background using a Jenni Bowlin grey dabber which I then spritzed over the top with a mica spray. The image is collaged on top of the card and the words are on 3d foam (my new best friend now thanks to Hels Sheridan!)
All images are stamped using black Archival ink. (remember to zap it with a heat tool before you begin using your images as it's quite a wet ink)

TFL
Mandy x

Thursday 22 November 2012

Santa Loves The bad Girls By Evil Edna


On my recent travels in blog land I came across this card on Evil Edna's Blog. I love how she had used the Lost Coast Stamp so I asked her if I could share it on our DT Blog. She kindly said yes.
Full details of the quote and her original write up about it can be found on the original post on her blog HERE.
Thank you EE for letting me share it.

Carol x


Wednesday 21 November 2012

How to create an original gift - by Lottie

Have you seen these fabulous aprons on the Happy Daze website?

 I was looking for some ideas for birthday and Christmas presents and found this apron.
Just the thing for an adult - male or female - who's into crafting or baking etc.  I bought one and was absolutely amazed at the super quality - really thick and strong and very well made.
Apologies for having to photograph this on a blanket but it was the best way to get a photo.

Looking down on it, I thought how nice it would be to decorate it in some way and turn it into an original!   I hunted through my old books and came across a large paper back which I have  had for over 40 years.  It's a book on how to paint Chinese Style, and has some wonderful step by step images in it.  "Ping" a lightbulb moment - instead of painting on the apron I decided to do an image transfer.  Image transfer papers are easy to find on the web.  You need one for transferring an image onto material that you can wash.

 I chose this example of one of the paintings - printed it onto the A4 transfer paper, then trimmed out the parts I wanted.
 You print on the plain side of the paper (obviously) then choose where on the apron you want the image and then iron on the hot setting for a short time  (you will get the exact timing instructions with the paper) over the back of it.  In this case just a minute, then peel off the backing paper.  (I have peeled back a corner to show you.)
Voila!
 I chose to have the image across the pocket - so the little bird in peeking into it.
 The apron is just brilliant -  there are no chunky seams where the apron strings are attached - just one long strip that is threaded through either side and right around the neck - so you can adjust the length to fit every height!
Sorry about the model, she hung the apron loose so that you can see what it looks like on!

The texture of the image is smooth feeling, like those you get on tee shirts - so you get a perfect reproduction of the image you choose.

Think of all the possibilities.  You could personalise it, by stamping on the image transfer paper directly, or why not scan some of your artwork you've made and print it out on the paper.

Go on  - give it a try and create a totally original gift for someone special.

Thank  you so very much for visiting and commenting on my 'efforts' for this months' theme.
I thoroughly enjoyed participating in the challenge.

I have been looking at your blogs seeing your brilliant 'Brighten up the month' entries, and apologise for not leaving comments as I would normally do - due to a family health emergency - but rest assured I'll keep visiting.


Good luck in the draw!


Tuesday 20 November 2012

Picture Star Canvas


I made this colourful canvas for the 'Brighten Your Month' challenge - hope you will join in! I used the Picture Star and Whimsical Melange plates from Artistic Outpost. I covered the canvas with tissue wrap - you can buy similar here - using gel medium, and then went over it with gesso and distress inks. I stamped some background images in black. I covered a piece of glossy card with distress inks in shades of blue and stamped the main images in Cobalt Blue archival ink, and added the words, 'You Outta Be in Pictures' behind a piece of Tim Holtz film strip, curling the end of it. I finished off with some embellishments and mica flakes.

Monday 19 November 2012

Bee Happy... By Carol Fox


For my 2nd DT Piece this month for Happy Daze I have use Stampotique Rubber stamps to alter a wooden box. I have had a couple of these boxes hanging around for ages since I brought them as a back up plan for something I was doing. Being a hexagon shape I think they work really well with the Bee Stamp.


The box was given a crackle finish and then all the stamping was done directly onto the box. The bee was coloured with Alcohol inks and stickles were added to the wings.

I used

Bee Stamp
Hexagon Stamp
Alcohol ink,  Alcohol Ink Pen,
Stickles

Carol, x

Sunday 18 November 2012

'' You're A Star ''

Hi, am back again using the new Artistic Outpost stamps - Picture Star.


Using Distress Inks and watercolours, diluted Inka Gold, Stickles and the rest from stash.

The little girl is a real cutie pie and she obviously loves her new dress doesn't she !

Wishing you all a great week ahead.  Take care of yourselves, hugs Annette x

Saturday 17 November 2012

Tag! You're it!

On this tag I've used some Zetti legs... cannot resist these beauties! I've also used some element stamps from the zetti range. The little triangles on the sides of the tag are the roof of the mini houses.
Have a great weekend!
TFL
Mandy x

Friday 16 November 2012

Artistic Outpost Tags...By Carol Fox


I have used the Artistic Outpost stamp set Picture Star on my  DT piece this month.
I have done two larger sized tags. I used Claudine Hellmuth paint for the background, mixing  Dash of Red and Painterly pink to get my shade. I them dragged a Pink Sherbert Dabber down it. The background was stamped directly using Black archival ink. The main image's and quotes were stamped onto card, coloured with diestress markers and then glued into place. The stamped stars were painted with Dab of Yellow.

I used

Claudine Hellmuth Paints
Artistic Outpost Rubber Stamps
Paint Dabber

Carol x

Wednesday 14 November 2012

I'm brightening up the month with Verday - by Lottie

Going with this month's Happy Daze theme of 'Brighten up the month', I decided to do it with Verday paints and Patina which you can buy here.

I have Paula Whittaker to thank for the inspiration which I took from a card I received from her which is featured in the frame.  It is Roman inspired.  Unfortunately I couldn't get a frame to fit the   6"x6" card which was a bit wider - but I could fit most of it in this frame.  I loved her vintage colouring and tried to replicate it.


I made my own mould of Roman relics from polymer clay which you can buy here.  I don't think air dry polymer clay will work for this - purely for the durability you need for this project.
As you can see (I hope) this is a fragment showing a Roman ladies head looking coyly down.  (She wasn't dressed so I only did her head and shoulders!)

After baking the moulded fragments, they had a coat of Verday paint (I'll just show you one)
 I painted one coat of Verday paint on the outer fragment
 Then the next day I painted another and whilst wet added the Verday patina coat to the outside.
Then painted the roman head.

I left the heads to dry for a couple of days, then buffed them up, glueing them to the frame once I had finished decorating it.
A plain wooden picture frame was first painted with texture paint.  When dry I painted a layer of pale blues.  The darker blues are Verday paint that has had the patina treatment, and of course the metallic colours not only mirror those of the 'metal fragments' but also the colour of Paula's framed card.

Sorry for the differences in the lighting and colours - it's my photography.  I bought a photo tent to try and get a better picture - the bottom image - but it really didn't work as it bleached out the colours somewhat.  The true colours are those of the other photos.  This looks so much better in 'real life' and daylight.  The metal Verday really shimers and glistens and when I walk into my craft shed it truly shines with the light on it - looking solid like a chunk of precious metal rather than a wooden picture frame.

I hope that I have inspired you to have a go with the magical Verday paints - they are great fun and you can let your imagination run riot and create truly one off original works of art.

When I received Paula's card - I never dreamt for one minute that it would send me off to Roman ruins and give me the imagination to use Verday Paints and Patina like this.

Why not have a 'play' because that's just what I did.  I'm  not clever enough to design or plan anything.  I just had a rummage around and found the wooden frame amongst my 'junk' and just sat and played.  It's really enjoyable - trust me.

Let me know how you get on and I'll come and 'visit' you.


Tuesday 13 November 2012

Cocoa Boy Card


I have made this colourful card for the 'Brighten your Month' challenge, using the cheery Spring and Summer Distress Ink Pads and the Think and Wonder plate by Artistic Outpost. The image has been stamped on a wrinkle free distress background with some book text placed behind it, and the card blank edges sponged with Picked Raspberry. And can you guess what I used for the speckled background?!

I finished off with a die cut butterfly and the Wonder and Think wording.

Monday 12 November 2012

Angel

This week I've used the Praying Angel from Lost Coast to make this hanging piece. I stamped the image once in Black Archival and then once more with versamark and embossed with gold. The image I embossed I attached to some board and cut out, then attached to some black card which I also cut out.

I cut out the inked angel and coloured with watercolour pencils and once dry adhered it to the hanging piece with 3d foam. Added some ribbon, beaded trim and lastly some stickles. 

 close up 
TFL
Mandy x

Sunday 11 November 2012

Grumpy Girl Box...By Carol Fox


This image by paperbag studios has always been one of my favourites from the Delight sheet, I just love the grumpy look on the girls face.


I have used it on the lid of one of these smaller sized wooden boxes. The text from the same sheet has been used around the edge. The box was painted and then sealed with Glue and Seal before the images were stamped onto the box. It was then gently coloured using alcohol inks, in the pens available in the shop here.

Saturday 10 November 2012

You may need sunglasses!

Our challenge for November is 'Brighten up the month' and with the clocks going back and a lack of proper daylight I was glad to get out the bright paints and feel summery.
I began by stamping the Mona Lisa stamp using Staz-on on to tissue paper, painting it with a skin tone paint on the reverse so she didn't look anaemic and using lots of PVA stuck her to the mini art canvas. I then went to town with the turquoise paint, flowers and sticky gems. Shrink plastic is becoming a firm favourite of mine so I stamped and shrunk Moon Girl and text from a Suzi Blu stamp.
Just a bit of fun! Hope you can join in the challenge,
Wishing you a happy day, Sam xxx

Thursday 8 November 2012

Chocolate Girl Tag.....By Moira Sutton


The background of this tag has been made using distress stains and the wrinkle free method.
The main image is Zetti, and the squiggle arms are by Stampotique. The dots are Silver Ferro used though a Dylusions Stencil "chequered Dots".

Wednesday 7 November 2012

I bet you haven't seen one of these before on Happy Daze!

Hello, I'm Lottie, and this months guest 'Designer'!!!
I know what you are thinking, and I thought that too when they asked me.
But it's great to be invited to create three items to brighten up the month - and it just proves that someone like me, who can't make a card for toffee, and who is definitely not a designer in any way can be picked.  They really do look at your blogs when you join in the challenges.


 I have been 'rummaging around' the Happy Daze shop looking for something different for Christmas presents, and I was not disappointed.
I've found something that will be great for children and adults.
It's lined with plastic so it can hold water,  
It packs flat so it's cheap to post!
It's  brilliant - so much so you'll want to buy one for yourself too!
It's a collapsable Paint Brush Bucket!
I've found different uses for mine - but first I decided to personalise it.
I stamped on two of the sides using brown acrylic paint.
 I've never tried doing that before so I was a bit apprehensive - but it was easy.
I spread brown paint on a washable flat surface, then just gently tapped the stamps on it, checking that the stamps have an even covering.  If you put too much paint on your stamp on your first attempt, don't be tempted to use it - just wipe the stamp clean, and try again; if it is too thick and gloopy you won't get a clear image, and clean your stamp/s as soon as you have stamped  your images as paint dries quickly and  you might not get it properly clean if you leave it.
 Leave the bag to dry properly, then colour you image in. 
 I have multi uses for mine.  As you can see, its holds lots of paintbrushes.  I have a number of very tall ones too, so decided to make the most of the bag by storing everything in one place.
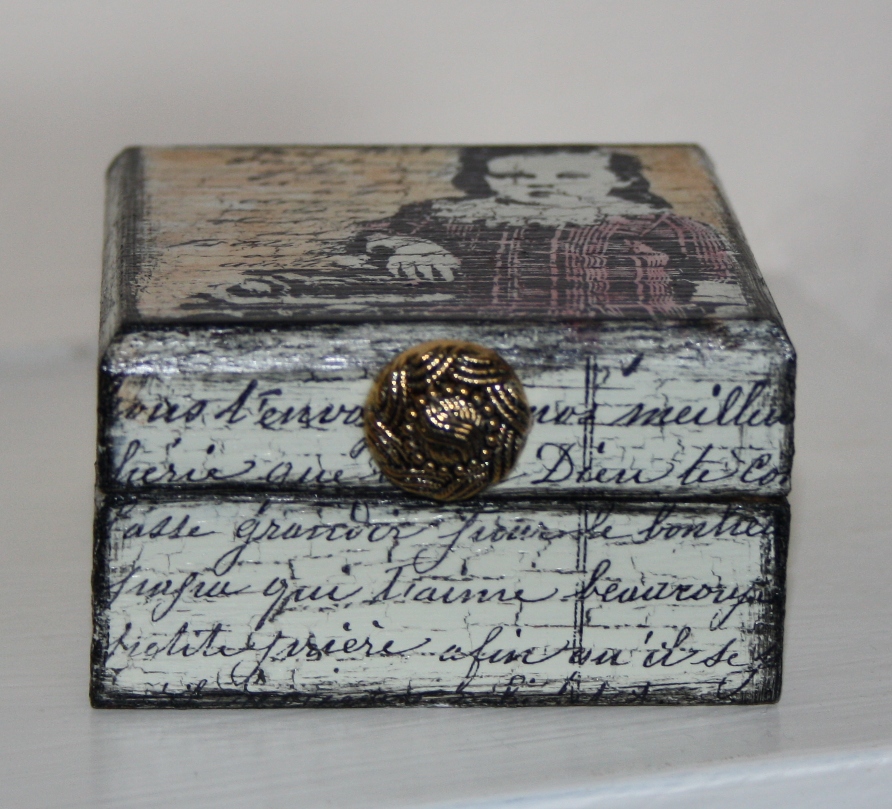
This is one of those big chilli con carne tins which I have covered.
 I was looking through my old ATC collection for inspiration, and realised that those little works of art hardly ever see daylight!
 So I scanned some into the computer and printed them off and used them to decorate the tin, which fits nicely into the middle of the Paint Brush Bucket
 This is great as it holds my watercolour pencils too! All neat and in one place.  I'll be getting another for my colouring pencils, Promarker pens, and water colour crayons.
When I am ready to paint I just lift out the pot of paintbrushes, and pop in a jam jar, or a big yoghurt pot or fill with water!  There are so many other uses: for all my polymer clay tools - they'll be near to hand and tidy on my desk ready to use,  instead of hidden away in a drawer, ditto my jewellery making tools, colouring pencils etc

More ideas...... decorate one very girly with pretty stamped images, add embellishments, flowers etc. and do the same for a boy with another colour.  Add a name tag too to presonalise it.  If you don't have time to personalise one - just buy some for presents.  They are so cool and great for arty crafty friends and children
Am I allowed to say how much they are?
£3.80  I'm not being a 'cheapskate' but they do make really lovely presents - for adults and children alike!  What a bargain!

Yes, with Happy Daze, you sure can brighten up the month, and make birthday and Christmas presents at the same time!

Go on, give it a go, and do send me a link as I would love to see what you create.

And thanks so much for looking - and if I can do something anyone can - so all my three 'makes' are easy peasy.

Tuesday 6 November 2012

Kudzu Cafe Canvas Board


I decorated this canvas board using the gorgeous new stamps by Artistic Outpost called Kudzu Cafe. I used patterned tissue paper first - you can buy similar here - then sponged on Distress Inks and stamped with a selection from the set, then added more prominent ones on tissue paper in different shades of ink. I also used the small mesh stamp from Whimsical Melange which is a great 'filler' stamp for adding visual texture.  I stamped the Kudzu Cafe on glossy card and coloured it with Distress Markers. Finally I added some die cut vines climbing around the cafe to represent the prolific Kudzu vine.

I hope this is colourful enough to brighten up your world and encourage you to join in this month's challenge!

Monday 5 November 2012

Once Upon A Time

Here is an altered book that I've made this week, using a (very) cheap notebook from a supermarket (think it cost me 18p) and then some acrylics on paper ~ using a scraping method with an old phone card.

I've used a zetti stamp ~ you can find a huge selection here. All stamping is done with Ranger Archival Ink in jet black.

This month's challenge is BRIGHTEN UP THE MONTH ~ check out the details here to find out how you can win a voucher for the Happy Daze online shop.

TFL
Mandy x

Sunday 4 November 2012

'' You outta be in Pictures '' by Annette Goatley

Hi, November's theme is Brighten up the Month.  The new stamps 'Picture Star' by Artistic Outpost certainly brightened up my month.


''Down on your heels
Up on your toes
That's the way to do the Varsity Drag.''

Stamped the images on Speciality Stamping Paper with Archival Coffee Ink, adding some Distress Inks to give an aged appearance, the rest is simply matting and layering.  A lovely simple card to make which I think looks quite glamorous despite not having any embellishments.

Looking forward to seeing your interpretation of the theme this month.
Take care of yourselves, hugs Annette x

Friday 2 November 2012

October Challenge Winner

Well the winner was chosen in a slightly different way today. I could not the Random number thing to load, so I put 14 bits of cat biscuit on the floor in a line and then let the cat into the room. The first one he went to to eat was the 6th in line so the winner is NO6 Kate 
So Kate, if you drop Moira at the shop an email she will arrange your gift voucher for you.


This is a picture of the kitty machine, having a little snooze after his hard work.Hopefully normal service will be resumed for next month when the winner is chosen.

Thursday 1 November 2012

November Challenge Brighten Up The Month

The challenge title of Brighten up the month says's it all really, use bright colours to make something, other than the colour its an open theme this month.

You can enter the challenge up to 3 times and the only rule is that you have to use something that is availalble to buy from the Happy Daze Shop.

You can enter via the linky widget at the  bottom of this post.

Here are a few DT items to inspire you.

All the Designs have used Stamps by Artistic Outpost 's New Release '' Picture Star ''

By Lucy


By Netty


By Carol