Saturday, 17 November 2012

Tag! You're it!

On this tag I've used some Zetti legs... cannot resist these beauties! I've also used some element stamps from the zetti range. The little triangles on the sides of the tag are the roof of the mini houses.
Have a great weekend!
TFL
Mandy x

Friday, 16 November 2012

Artistic Outpost Tags...By Carol Fox


I have used the Artistic Outpost stamp set Picture Star on my  DT piece this month.
I have done two larger sized tags. I used Claudine Hellmuth paint for the background, mixing  Dash of Red and Painterly pink to get my shade. I them dragged a Pink Sherbert Dabber down it. The background was stamped directly using Black archival ink. The main image's and quotes were stamped onto card, coloured with diestress markers and then glued into place. The stamped stars were painted with Dab of Yellow.

I used

Claudine Hellmuth Paints
Artistic Outpost Rubber Stamps
Paint Dabber

Carol x

Wednesday, 14 November 2012

I'm brightening up the month with Verday - by Lottie

Going with this month's Happy Daze theme of 'Brighten up the month', I decided to do it with Verday paints and Patina which you can buy here.

I have Paula Whittaker to thank for the inspiration which I took from a card I received from her which is featured in the frame.  It is Roman inspired.  Unfortunately I couldn't get a frame to fit the   6"x6" card which was a bit wider - but I could fit most of it in this frame.  I loved her vintage colouring and tried to replicate it.


I made my own mould of Roman relics from polymer clay which you can buy here.  I don't think air dry polymer clay will work for this - purely for the durability you need for this project.
As you can see (I hope) this is a fragment showing a Roman ladies head looking coyly down.  (She wasn't dressed so I only did her head and shoulders!)

After baking the moulded fragments, they had a coat of Verday paint (I'll just show you one)
 I painted one coat of Verday paint on the outer fragment
 Then the next day I painted another and whilst wet added the Verday patina coat to the outside.
Then painted the roman head.

I left the heads to dry for a couple of days, then buffed them up, glueing them to the frame once I had finished decorating it.
A plain wooden picture frame was first painted with texture paint.  When dry I painted a layer of pale blues.  The darker blues are Verday paint that has had the patina treatment, and of course the metallic colours not only mirror those of the 'metal fragments' but also the colour of Paula's framed card.

Sorry for the differences in the lighting and colours - it's my photography.  I bought a photo tent to try and get a better picture - the bottom image - but it really didn't work as it bleached out the colours somewhat.  The true colours are those of the other photos.  This looks so much better in 'real life' and daylight.  The metal Verday really shimers and glistens and when I walk into my craft shed it truly shines with the light on it - looking solid like a chunk of precious metal rather than a wooden picture frame.

I hope that I have inspired you to have a go with the magical Verday paints - they are great fun and you can let your imagination run riot and create truly one off original works of art.

When I received Paula's card - I never dreamt for one minute that it would send me off to Roman ruins and give me the imagination to use Verday Paints and Patina like this.

Why not have a 'play' because that's just what I did.  I'm  not clever enough to design or plan anything.  I just had a rummage around and found the wooden frame amongst my 'junk' and just sat and played.  It's really enjoyable - trust me.

Let me know how you get on and I'll come and 'visit' you.


Tuesday, 13 November 2012

Cocoa Boy Card


I have made this colourful card for the 'Brighten your Month' challenge, using the cheery Spring and Summer Distress Ink Pads and the Think and Wonder plate by Artistic Outpost. The image has been stamped on a wrinkle free distress background with some book text placed behind it, and the card blank edges sponged with Picked Raspberry. And can you guess what I used for the speckled background?!

I finished off with a die cut butterfly and the Wonder and Think wording.

Monday, 12 November 2012

Angel

This week I've used the Praying Angel from Lost Coast to make this hanging piece. I stamped the image once in Black Archival and then once more with versamark and embossed with gold. The image I embossed I attached to some board and cut out, then attached to some black card which I also cut out.

I cut out the inked angel and coloured with watercolour pencils and once dry adhered it to the hanging piece with 3d foam. Added some ribbon, beaded trim and lastly some stickles. 

 close up 
TFL
Mandy x

Sunday, 11 November 2012

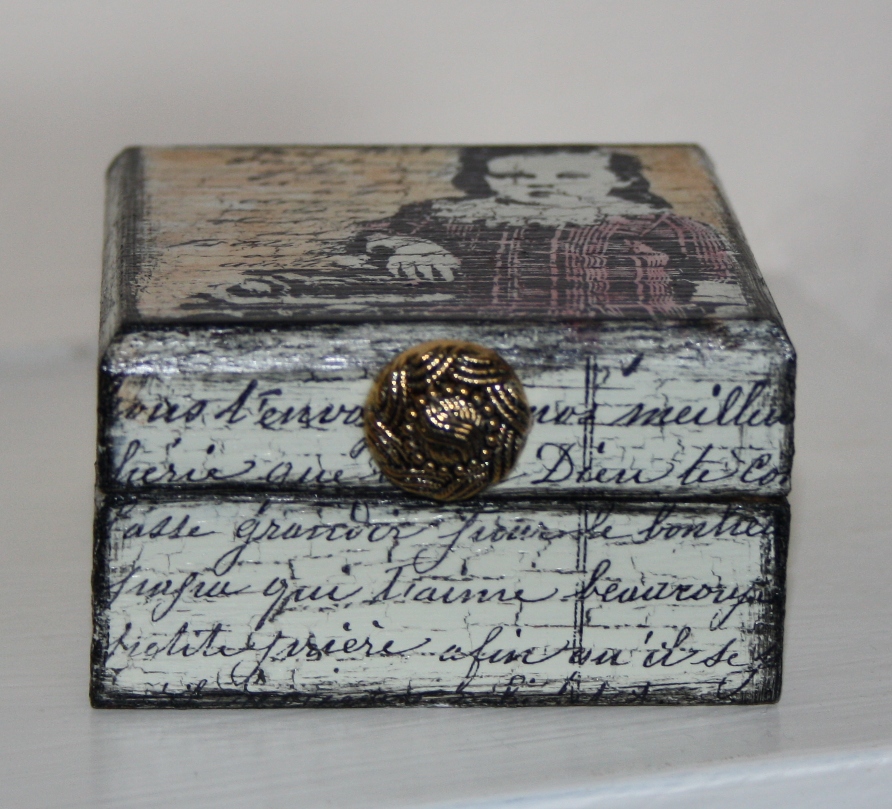
Grumpy Girl Box...By Carol Fox


This image by paperbag studios has always been one of my favourites from the Delight sheet, I just love the grumpy look on the girls face.


I have used it on the lid of one of these smaller sized wooden boxes. The text from the same sheet has been used around the edge. The box was painted and then sealed with Glue and Seal before the images were stamped onto the box. It was then gently coloured using alcohol inks, in the pens available in the shop here.

Saturday, 10 November 2012

You may need sunglasses!

Our challenge for November is 'Brighten up the month' and with the clocks going back and a lack of proper daylight I was glad to get out the bright paints and feel summery.
I began by stamping the Mona Lisa stamp using Staz-on on to tissue paper, painting it with a skin tone paint on the reverse so she didn't look anaemic and using lots of PVA stuck her to the mini art canvas. I then went to town with the turquoise paint, flowers and sticky gems. Shrink plastic is becoming a firm favourite of mine so I stamped and shrunk Moon Girl and text from a Suzi Blu stamp.
Just a bit of fun! Hope you can join in the challenge,
Wishing you a happy day, Sam xxx