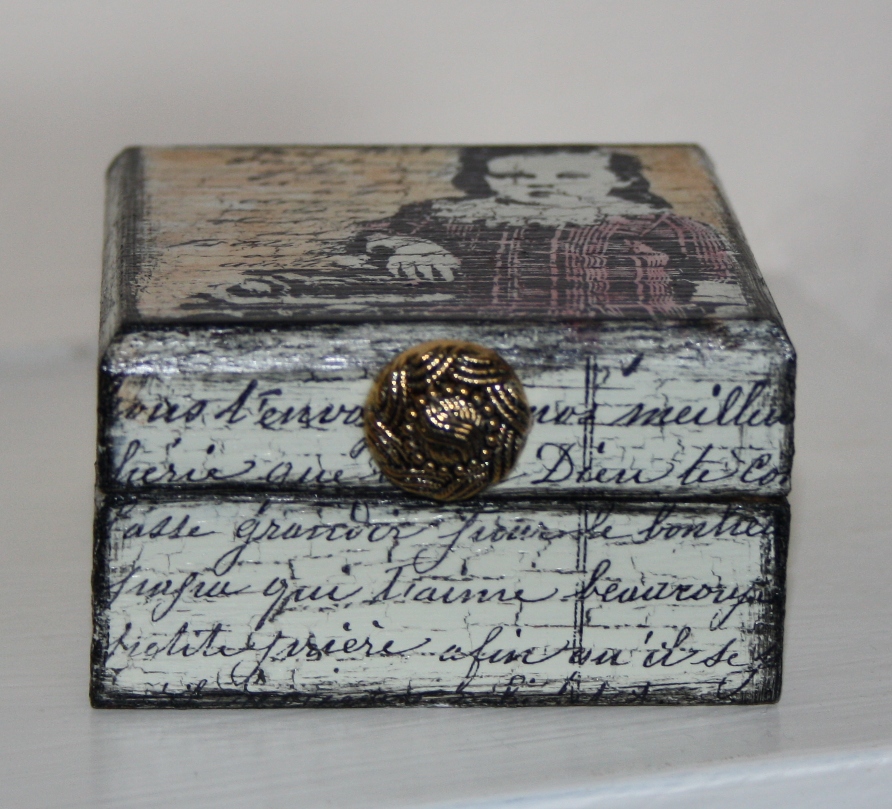
I have used it on the lid of one of these smaller sized wooden boxes. The text from the same sheet has been used around the edge. The box was painted and then sealed with Glue and Seal before the images were stamped onto the box. It was then gently coloured using alcohol inks, in the pens available in the shop here.
Showing posts with label wooden box. Show all posts
Sunday, 11 November 2012
Grumpy Girl Box...By Carol Fox
I have used it on the lid of one of these smaller sized wooden boxes. The text from the same sheet has been used around the edge. The box was painted and then sealed with Glue and Seal before the images were stamped onto the box. It was then gently coloured using alcohol inks, in the pens available in the shop here.
Thursday, 25 October 2012
Cherub Box... By Moira Sutton
This square wooden box has been used for this project. It was painted with Inca Gold paints and a collage image was added.
The leaves are Blackberry Ferro through the Dylusions Luscious Leaves Stencil.
The challenge this month is " Something Wicked This way Comes" The full details can be seen HERE . There is a £15.00 gift voucher in the shop to be won by one lucky randomly selected entrant.
Thursday, 21 June 2012
Beeswax and Bugs
This may be the shortest blog post ever but here is a little box I decorated using just a couple of stamps, Prismacolour pencils and some beeswax.
First I stamped the images on to white card and traced with ordinary tracing paper and transferred the images to the box. I then coloured using Prismacolour pencils and then covered with beeswax and distressed it by scratching into the beeswax, applying paint and then rubbing off and buffing up with a soft cloth.
I used the Pretty Girl Stamp by Suzi Blu
and a Wooden Box
It smells divine too!
Apologies for the short post, I've damaged my back and at the moment I'm unable to sit or stand for any length of time, I do hope you like my little box.
Wishing you a happy day, Sam xxx
Labels:
Lost Coast Designs,
Sam Read,
Suzi Blu,
wooden box
Wednesday, 7 March 2012
Paris Exposition Vanity Box By Carol Fox
I have used the Artistic Outpost stamps Paris Exposition and French Flight to alter this Box. The Box is one of the Vanity Boxes available from the shop.
The background has been created by using a crackle paint background, I found the blue was too bright when this was done, so I applied a coat of Picket Fence distress stain which gave it a lovely aged look.
Viva Inka Gold in Hematite was applied through a crafters Workshop Stencil.
All the stamping was done using black archival ink.
Acrylic fragments and arrows were added to the lid.
The challenge this month is "March To Your Own Tune" use anything musical. For full details of the challenge have a look HERE
The background has been created by using a crackle paint background, I found the blue was too bright when this was done, so I applied a coat of Picket Fence distress stain which gave it a lovely aged look.
Viva Inka Gold in Hematite was applied through a crafters Workshop Stencil.
All the stamping was done using black archival ink.
Acrylic fragments and arrows were added to the lid.
The challenge this month is "March To Your Own Tune" use anything musical. For full details of the challenge have a look HERE
Tuesday, 14 February 2012
Altered Box By Carol Fox
To fit with this months challenge theme I have altered a box, yes I love boxes, but better than that I have used another love Viva Inka Gold. So there is it, it's out in the open I have two loves, but it's ok they know each other and they are quite cool about it, and as they work really well together neither minds.
This is one of the larger sized wooden boxes from the shop. I have simply coloured it with Inka Gold in Lava Green and Steel Blue and together they give this lovely patina shade which I love.
I have stamped on the peacock stamp who's maker eludes me using Archival ink, you must use an archival ink over the inka gold or else the image just seems to disappear. I finished the image with a bit of glossy accents here and there just to highlight bits of it.
I have embellished it with one of the lovely peacocks which were a gift from a friend. I also used the Inka gold on this as its a brass tone metal charm. A large button from my stash for a faux knob and there is it all finished.
A lovely quick little project.
To see all the details of this month challenge take a look at the original post here and you will also get the chance to see Netty's lovely frame again.
This is one of the larger sized wooden boxes from the shop. I have simply coloured it with Inka Gold in Lava Green and Steel Blue and together they give this lovely patina shade which I love.
I have stamped on the peacock stamp who's maker eludes me using Archival ink, you must use an archival ink over the inka gold or else the image just seems to disappear. I finished the image with a bit of glossy accents here and there just to highlight bits of it.
I have embellished it with one of the lovely peacocks which were a gift from a friend. I also used the Inka gold on this as its a brass tone metal charm. A large button from my stash for a faux knob and there is it all finished.
A lovely quick little project.
To see all the details of this month challenge take a look at the original post here and you will also get the chance to see Netty's lovely frame again.
Tuesday, 24 January 2012
Imagine... altered wooden box by Julie Dandy
I started by painting the box with a light green acrylic paint and when dry painted over areas of it with crackle glaze. When the crackle was dry I painted over them roughly with white paint - I didn't want to obliterate the green just make it look shabby.
I highlighted the edges with Inka Gold in ROSE .
I stamped the image in coffee archival ink on to a piece of tissue paper and then glued it on to the lid with Claudines matte medium and then coated the whole box with it to give it a protective coat.
I added some torn pieces of TH tissue tape to the top and sides of the box.
I used Glitz stickers for the word "Imagine" inspired by the tissue tape.
I finished it off with a piece of ribbon and buttons glued on with the matte medium and tied a piece of ribbon around the box in a bow.
Don't forget about this months challenge is to try or to use something new. All the details of the challenge and how to enter can be seen here.
Hugs'n'snogs,
Julie xx
Subscribe to:
Posts (Atom)